Scanning your disk
A scan measures every file and folder inside the target you picked and sorts them biggest-first, so the space-eaters float straight to the top. Pick a target on the left, press the green button, and watch the results fill in live.
Picking what to scan
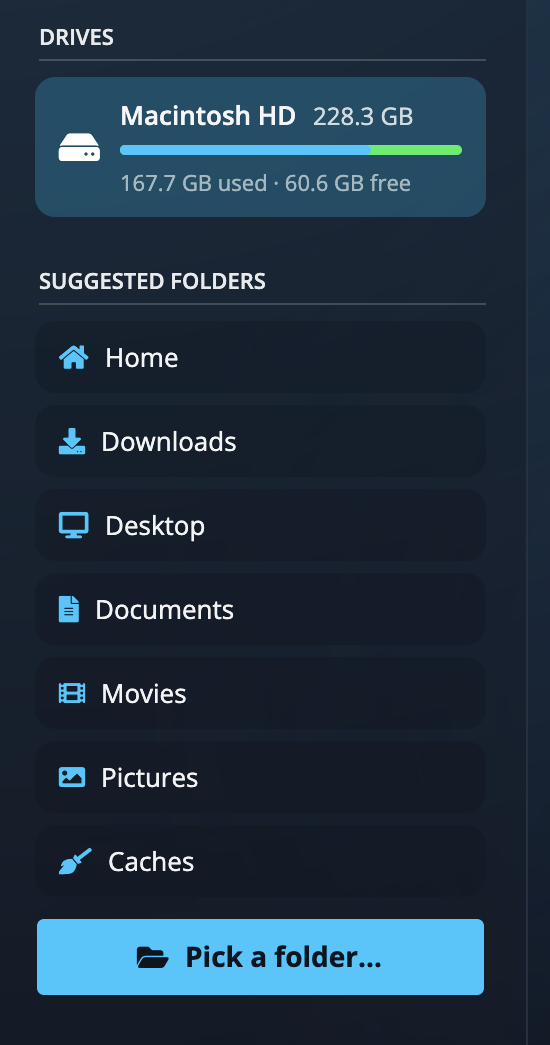
The column on the left lists everything you can point the scanner at:
| Group | What's in it |
|---|---|
| Drives | Your internal disks (Macintosh HD, C:). Each row shows the total size, a usage bar, and how much is used and free, a quick way to see which disk is actually full. |
| Mounts | External drives, USB sticks, and network shares. Only shown when something is plugged in or connected. |
| Suggested folders | The usual suspects: Home, Downloads, Desktop, Documents, Movies, Pictures, Music, and Caches. Scanning one folder is much faster than a whole drive. |
| Pick a folder… | Browse to any folder on any disk and scan just that. |
Disk almost full? Start with the whole drive so nothing hides from you. If you already suspect a folder (Downloads is a classic), scan just that one and you'll have results in seconds.
Before the scan: the preview
Clicking a target doesn't start anything yet. The middle of the window shows a preview with the drive's type, size, free space and format (or a folder's location), and a hint telling you to press Start scanning when you're ready. The chart on the right idles with a slow colored ripple until the first scan begins.
Starting and stopping
- Start scanning: the green button in the bottom bar scans whatever target is selected.
- Play on the row: hover any drive or folder in the left column and a small play icon appears; clicking it scans that target directly.
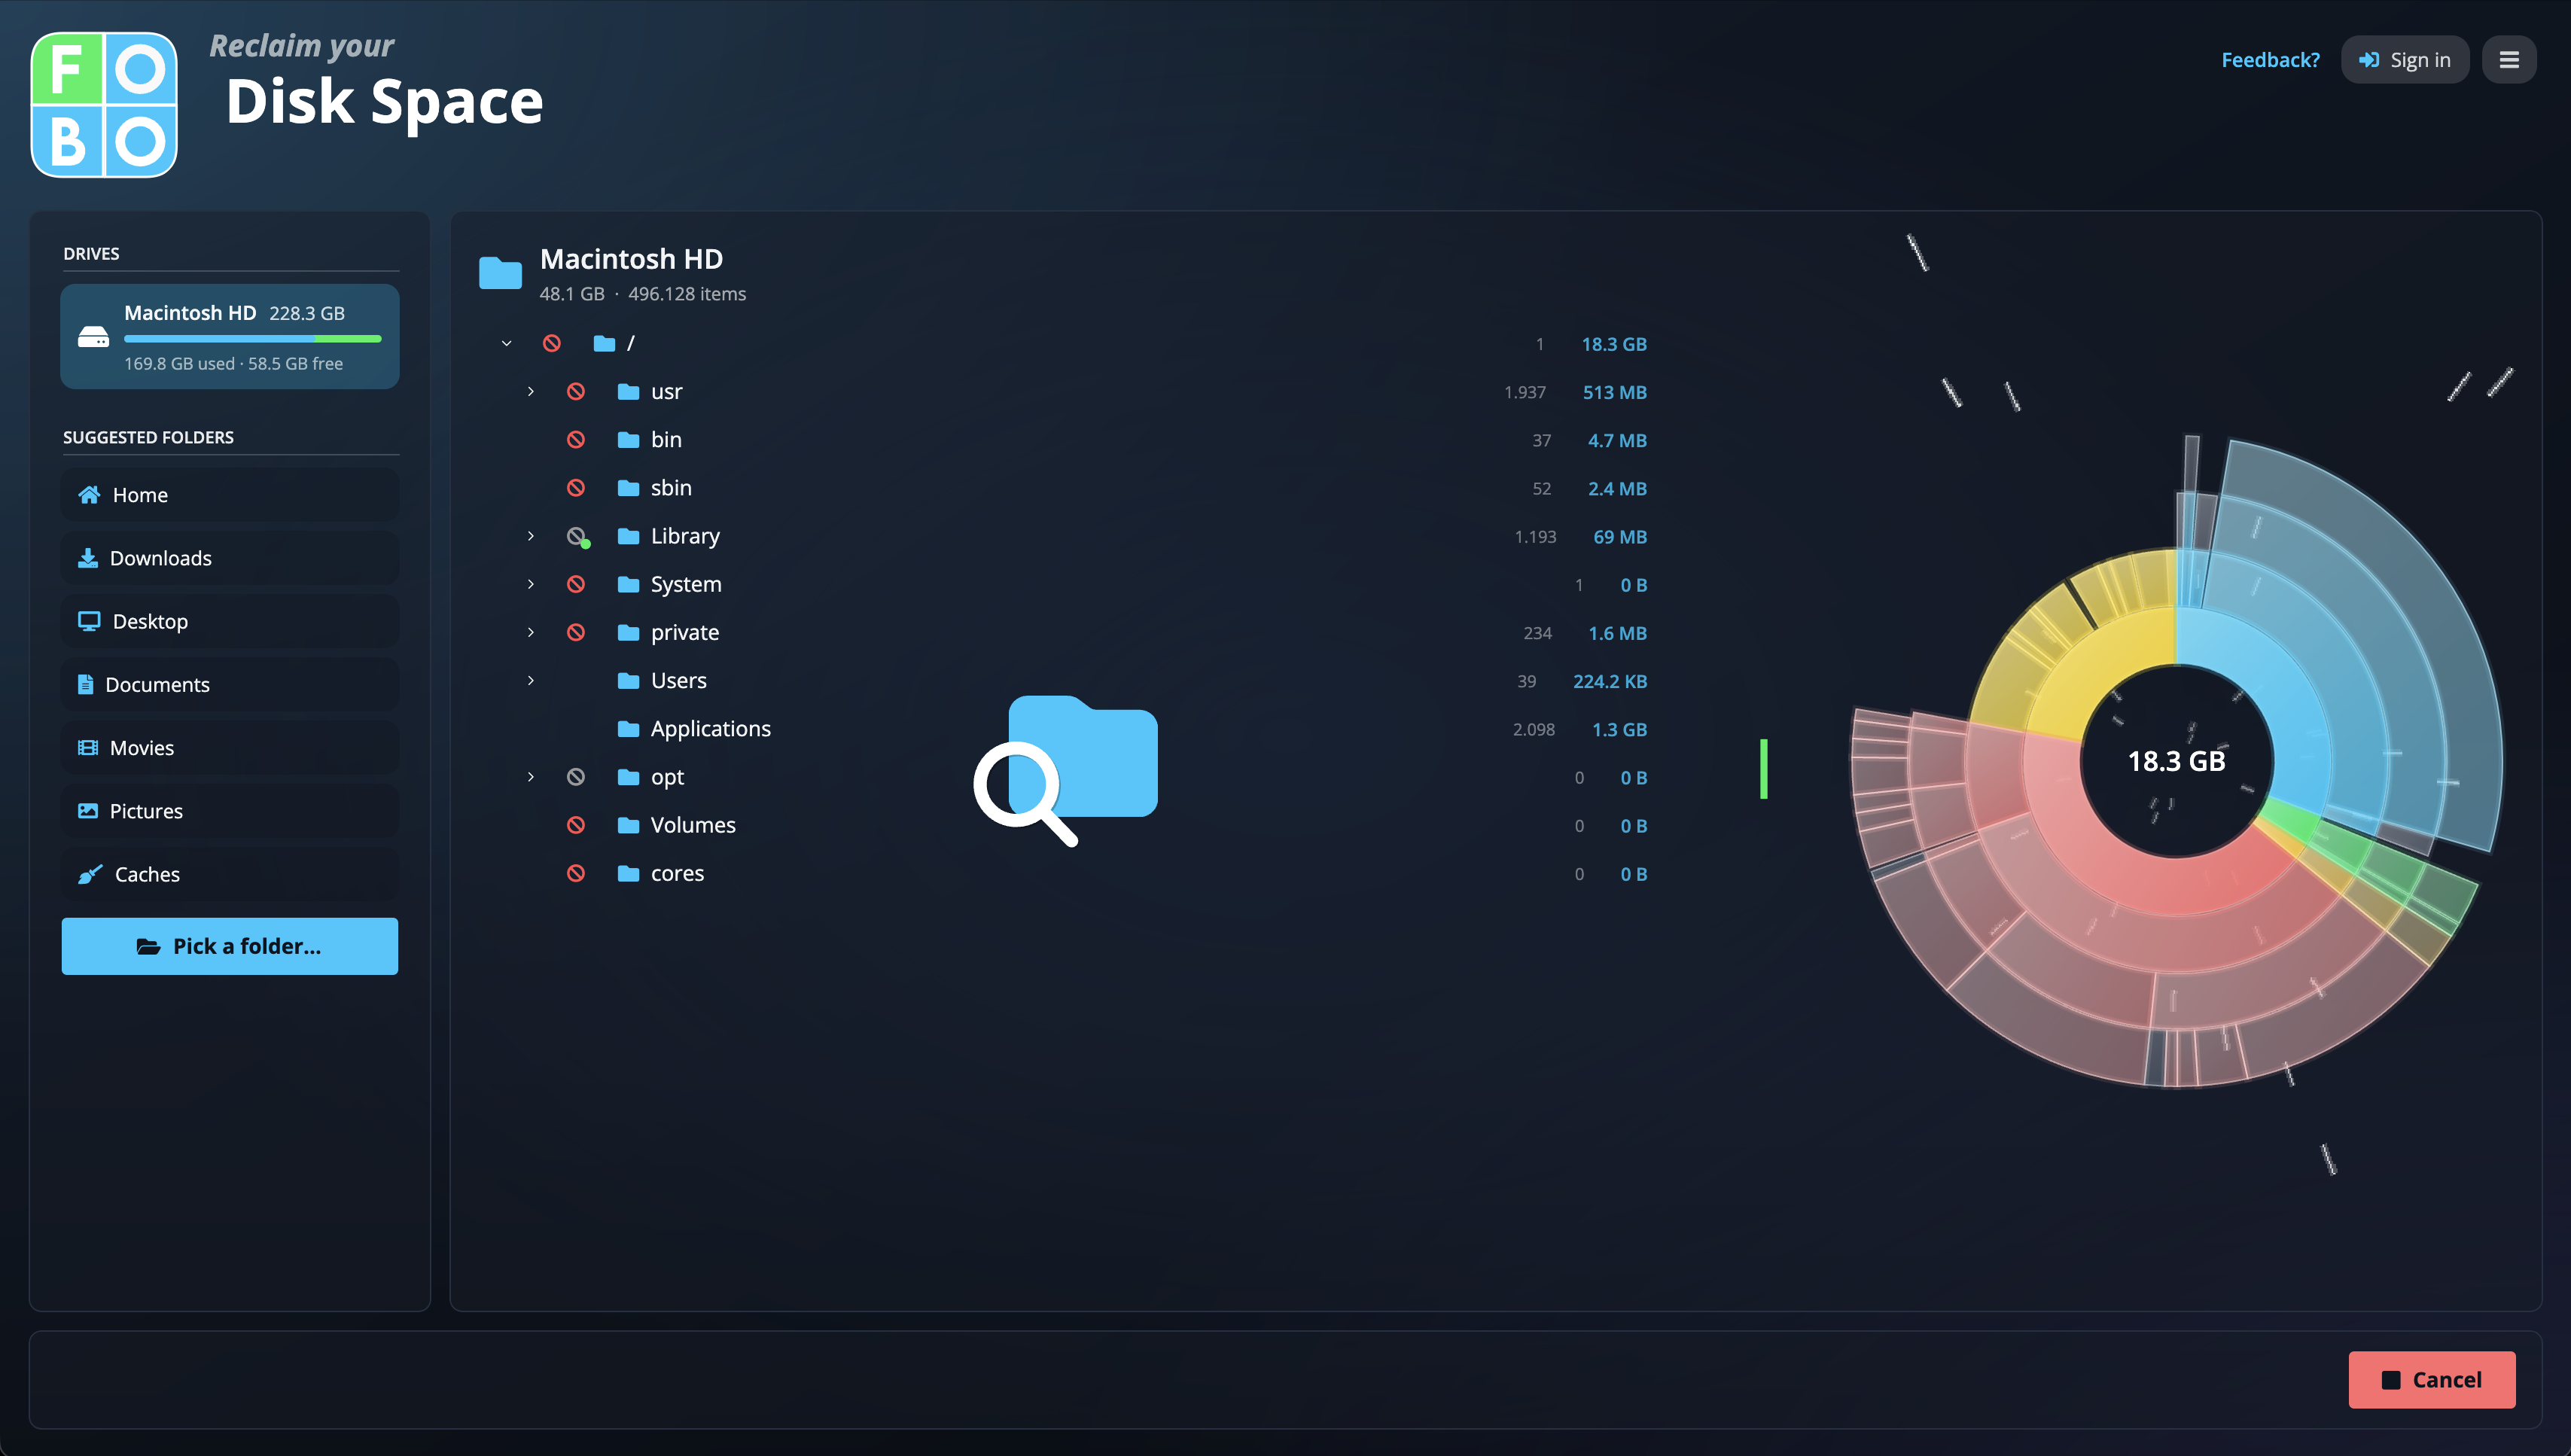
- Cancel: while a scan runs, the green button becomes a red Cancel. Stopping doesn't throw the work away. Everything measured so far stays on screen as a browsable result, marked stopped in the header.
While it runs
A magnifying-glass animation plays over the card and the tree fills in live, biggest items first, while a counter streams the total measured so far. A full drive can take a little while on the first pass; folders are usually quick.
Reading the header afterwards
When the scan finishes, the line above the tree sums it up, for example "128 GB · 412,304 items · 12 skipped (no access) · 34.2s":
- Skipped (no access) means some folders couldn't be read. On a Mac this usually means Full Disk Access hasn't been granted yet.
- stopped appears when you canceled; the numbers cover what was measured up to that point.
To run it again after cleaning up, press Scan again and the same target is re-measured from scratch.
Ready to make sense of the results? Continue with The tree & the chart.
Didn't find your answer?
We're happy to help. Open a ticket and we'll get back to you.